If all the new mechanics in the recent Total War: Warhammer 3 Chaos Dwarfs update have got your head spinning, you’re not alone. The new update and race have pretty dense gameplay mechanics. This complexity is exactly why we’ve created this Warhammer 3 Chaos Dwarfs guide to help you through all the new aspects of gameplay on the Immortal Empires grand campaign.
Total War: Warhammer 3 Chaos Dwarfs Guide
The primary concepts that changed in the Chaos Dwarfs DLC include:
- Labour, Raw Materials, and Armaments
- The Hell-Forge
- Tower of Zharr
- Military Convoys
- Technology Tree
- How they Play
- Hero Selection
We’ll go over each of the new concepts in the following guide.
Labour, Raw Materials, and Armaments
Labour, Raw Materials, and Armaments are 3 new resources. Labour is required to create Raw Materials, and Raw Materials are required to produce more Armaments. Armaments are an important resource needed to upgrade your units at The Hell-Forge.
Labour
Labour can be viewed under the Industry tab in each Province’s information panel or Labour Economy window. Players can earn more Labour by winning battles. Each turn, your Labour supply goes down depending on your Control over the province.
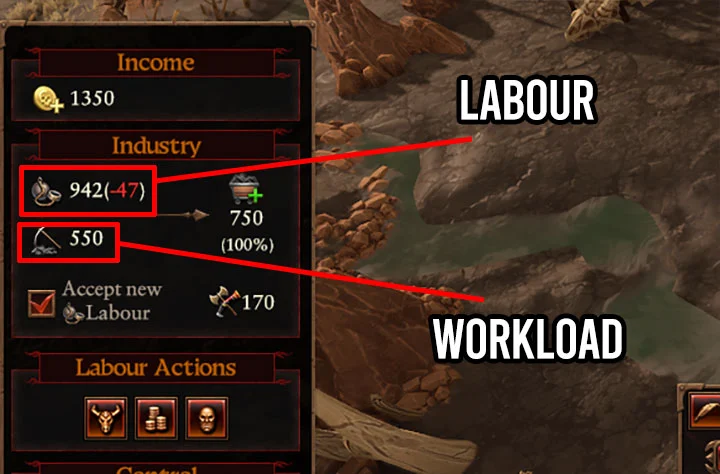
The icon under the Labour icon indicates your Workload or the minimum Labour required to stay at 100% efficiency. Essentially, you’ll want the top number to stay higher than the second number so you can produce the maximum amount of Raw Materials.
Labour Actions
If you have an excess of Labour, you can use it to gain other resources for your Faction.
Labour Actions include:
- Sacrifices for Zharr-Naggrund: Costs 200 Labour, provides +10 Conclave Influence.
- Sell Labour: Costs 200 Labour, Generates +1500 in Gold in your Treasury.
- Set an Example: Costs 200 Labour, provides +10 Control over your province.
This mechanic is useful if you have excess labor and are low on other resources.
Labour Economy
The last aspect of Labour we want to talk about is Labour Economy, which can be accessed at the top of the screen in the main campaign overview. Here, you can view a full list of all your provinces’ Labour, Workload, Efficiency, and Raw Materials. This is a useful screen to view all of your Labour stats for each one of your provinces instead of looking under the Industry tab.

Here, you’ll also be able to shift around Labour if a province is not at 100% efficiency. To do so, click the down arrow under Labour for a province that has an excess supply, then click the up arrow for the province that requires more Labour.
Keeping the New Intake box checked will ensure that Labour is spread to that province each time you win a battle.
Raw Materials
To produce Raw Materials, players must construct Outposts for their primary building in each Settlement. This opens the ability to build Mines in the other slots, which will create Raw Materials each turn. To maintain production efficiency with Raw Materials, players will need an adequate amount of Labour. Raw Materials can then be used to create Armaments, which can be used to upgrade your units.
Armaments
Armaments require a supply of Raw Materials and Factory settlements with the Armament Assembly Line building. They are the last phase in your Labour Economy production line, and the reason you need Labour and Raw Materials.
Ultimately, your Labour Economy production line will look like Labour>Raw Materials>Armaments>New Units and Upgrades. To maintain a steady supply of all materials, it’s critical that players create a balanced number of Outposts and Factories in each of their provinces.
The Hell-Forge
The Hell-Forge enables players to increase the unit cap for certain units and allows players to upgrade their units outside of the Technology Tree. The Hell-Forge has two parts, the Armoury and Manufactory. Click the right-most icon above the End Turn button to access The Hell-Forge.
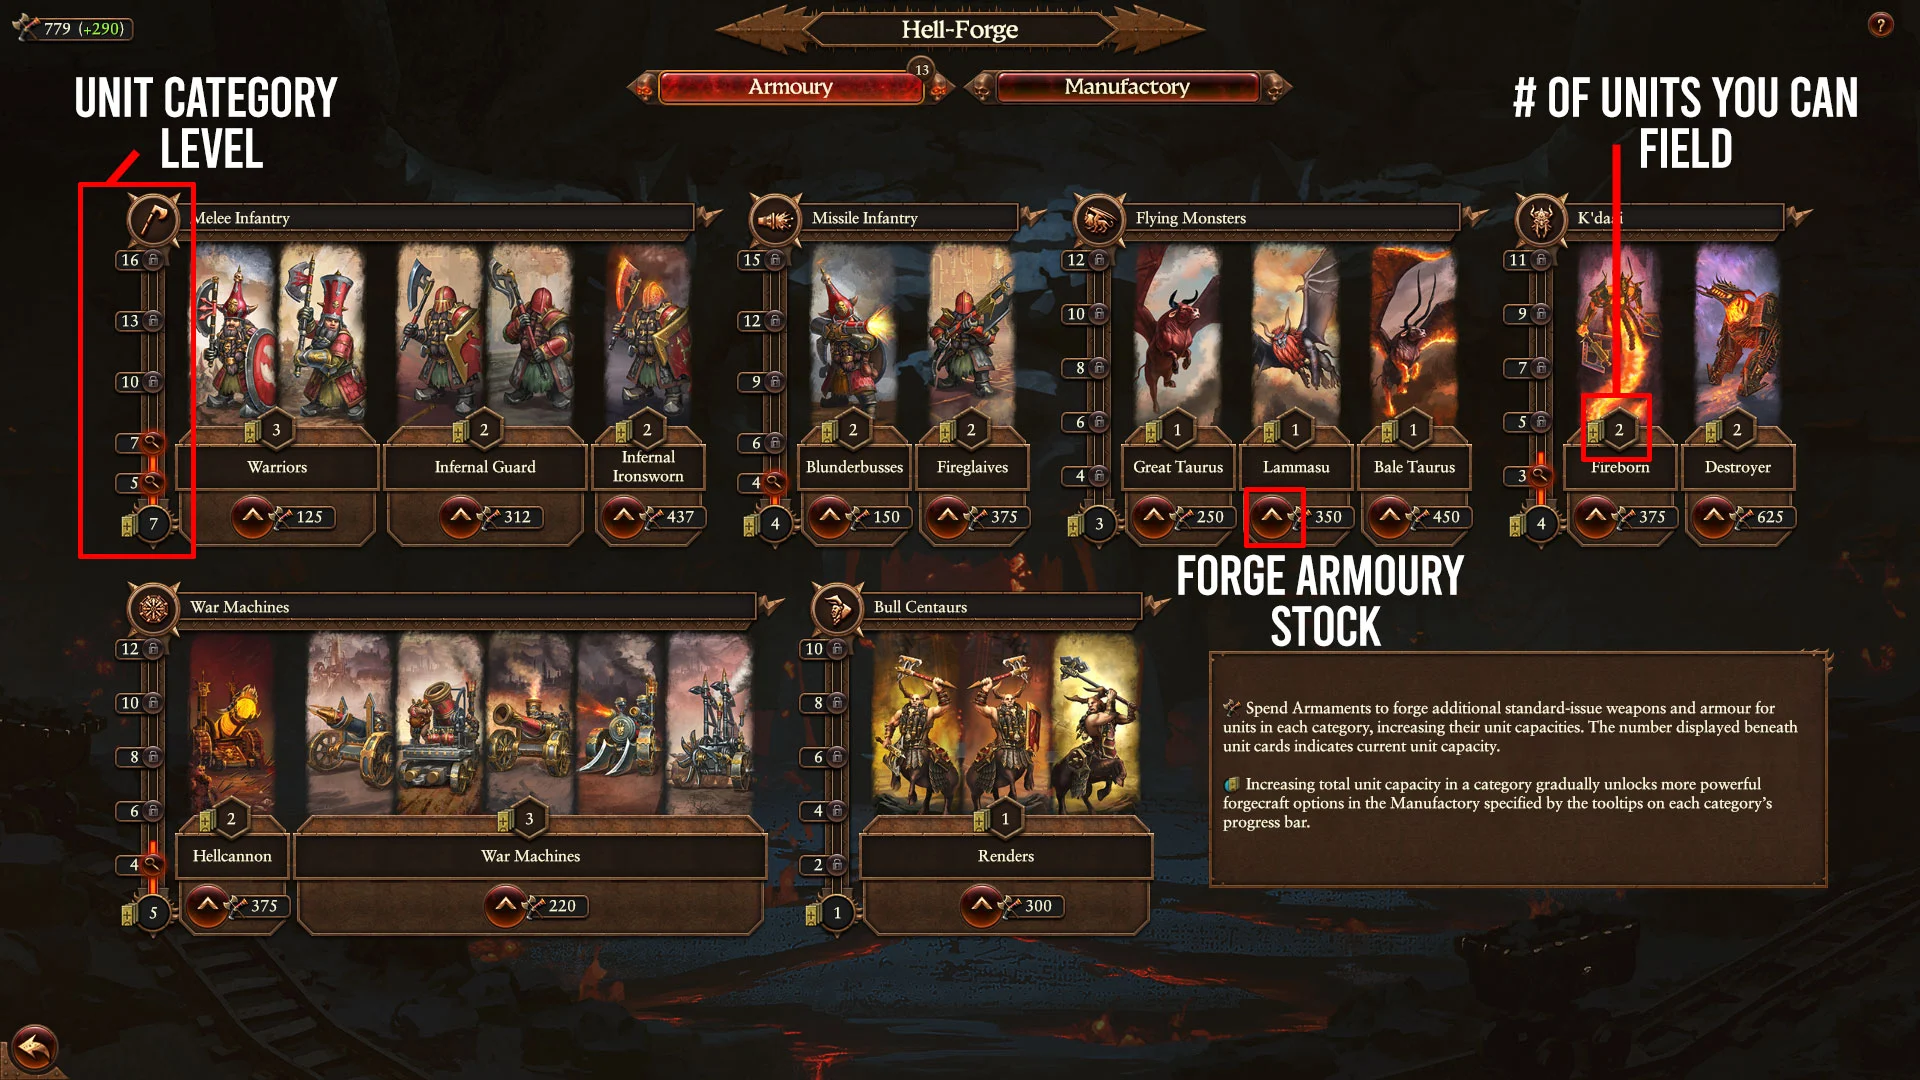
Armoury
The Armoury is the tab where you can increase your unit capacity for specific types of units. Units are broken down into 6 different categories, including the following:
- Melee Infantry
- Missle Infantry
- Flying Monster
- K’daai
- War Machines
- Bull Centaurs
Each category of units has a level, which is indicated on the left of each category. Players will earn Forgecraft Upgrades, which are passives and abilities for those types of units at certain level intervals. For example, Melee Infantry earns these upgrades at levels 5, 7, 10, 13, and 16.
Under each unit card, you have a number, which indicates how many of that unit you can field on the campaign map. To increase the number of units you can build, click the Forge Armoury stock button below the unit image. Doing so also increases your level of progress on the left side of the unit category.
To upgrade units, players need to have enough Armaments.
Manufactory
The Manufactory is where you can use the Forgecraft Upgrades you’ve attained for leveling up different categories of units in your Armoury. Select the unit category at the bottom of the screen, then select the Forgecraft Options on the right side of the screen and click the Apply button.
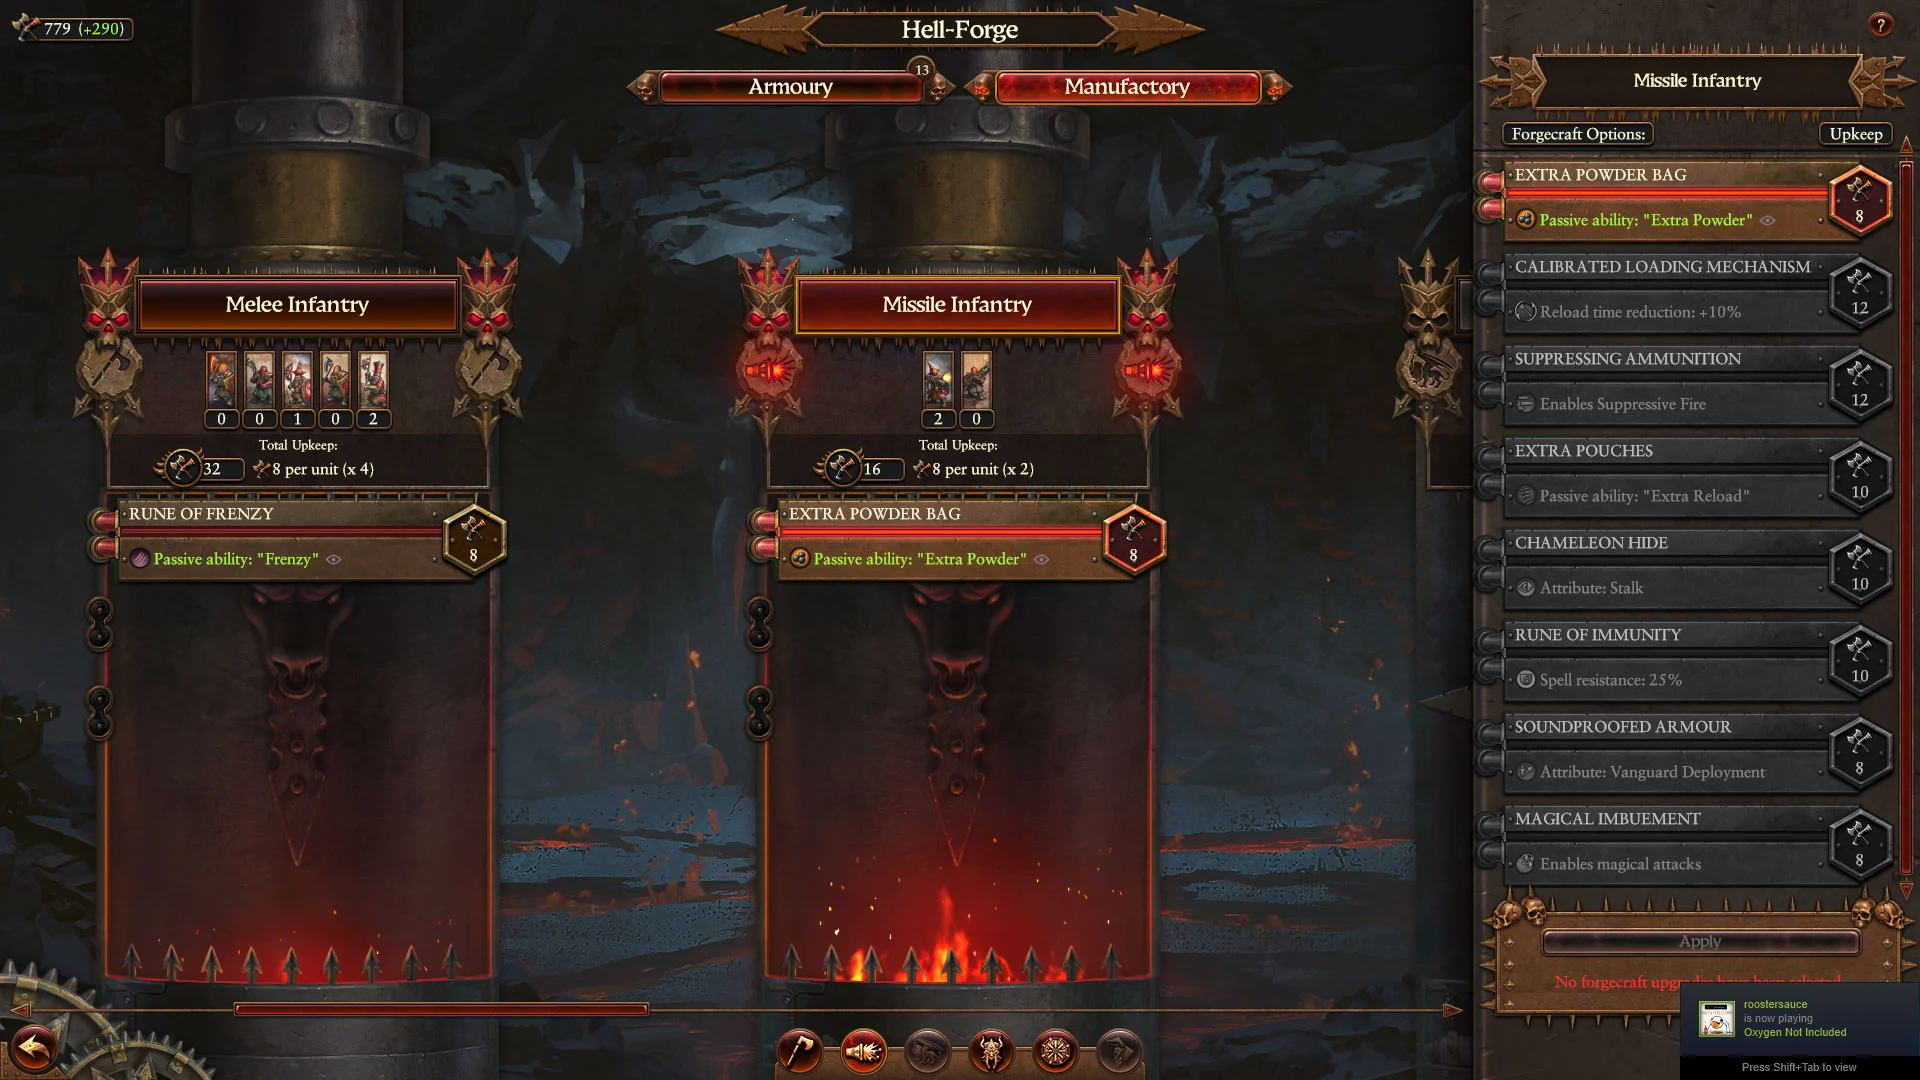
Applying these upgrades to your units provides a constant upgrade but requires an upfront Armament cost and a continuous Armament upkeep cost. Switching these buffs on and off isn’t advised since it will cost more Armament materials.
Tower of Zharr
The Tower of Zharr is a new mechanic for Chaos Dwarfs that can provide powerful faction-wide buffs and is accessed via the button left of the Hell-Forge above End Turn. Every Chaos Dwarf Faction in your campaign can participate in the Tower of Zharr. The Tower of Zharr is broken up into three categories:
- Sorcery District
- Military District
- Industry District
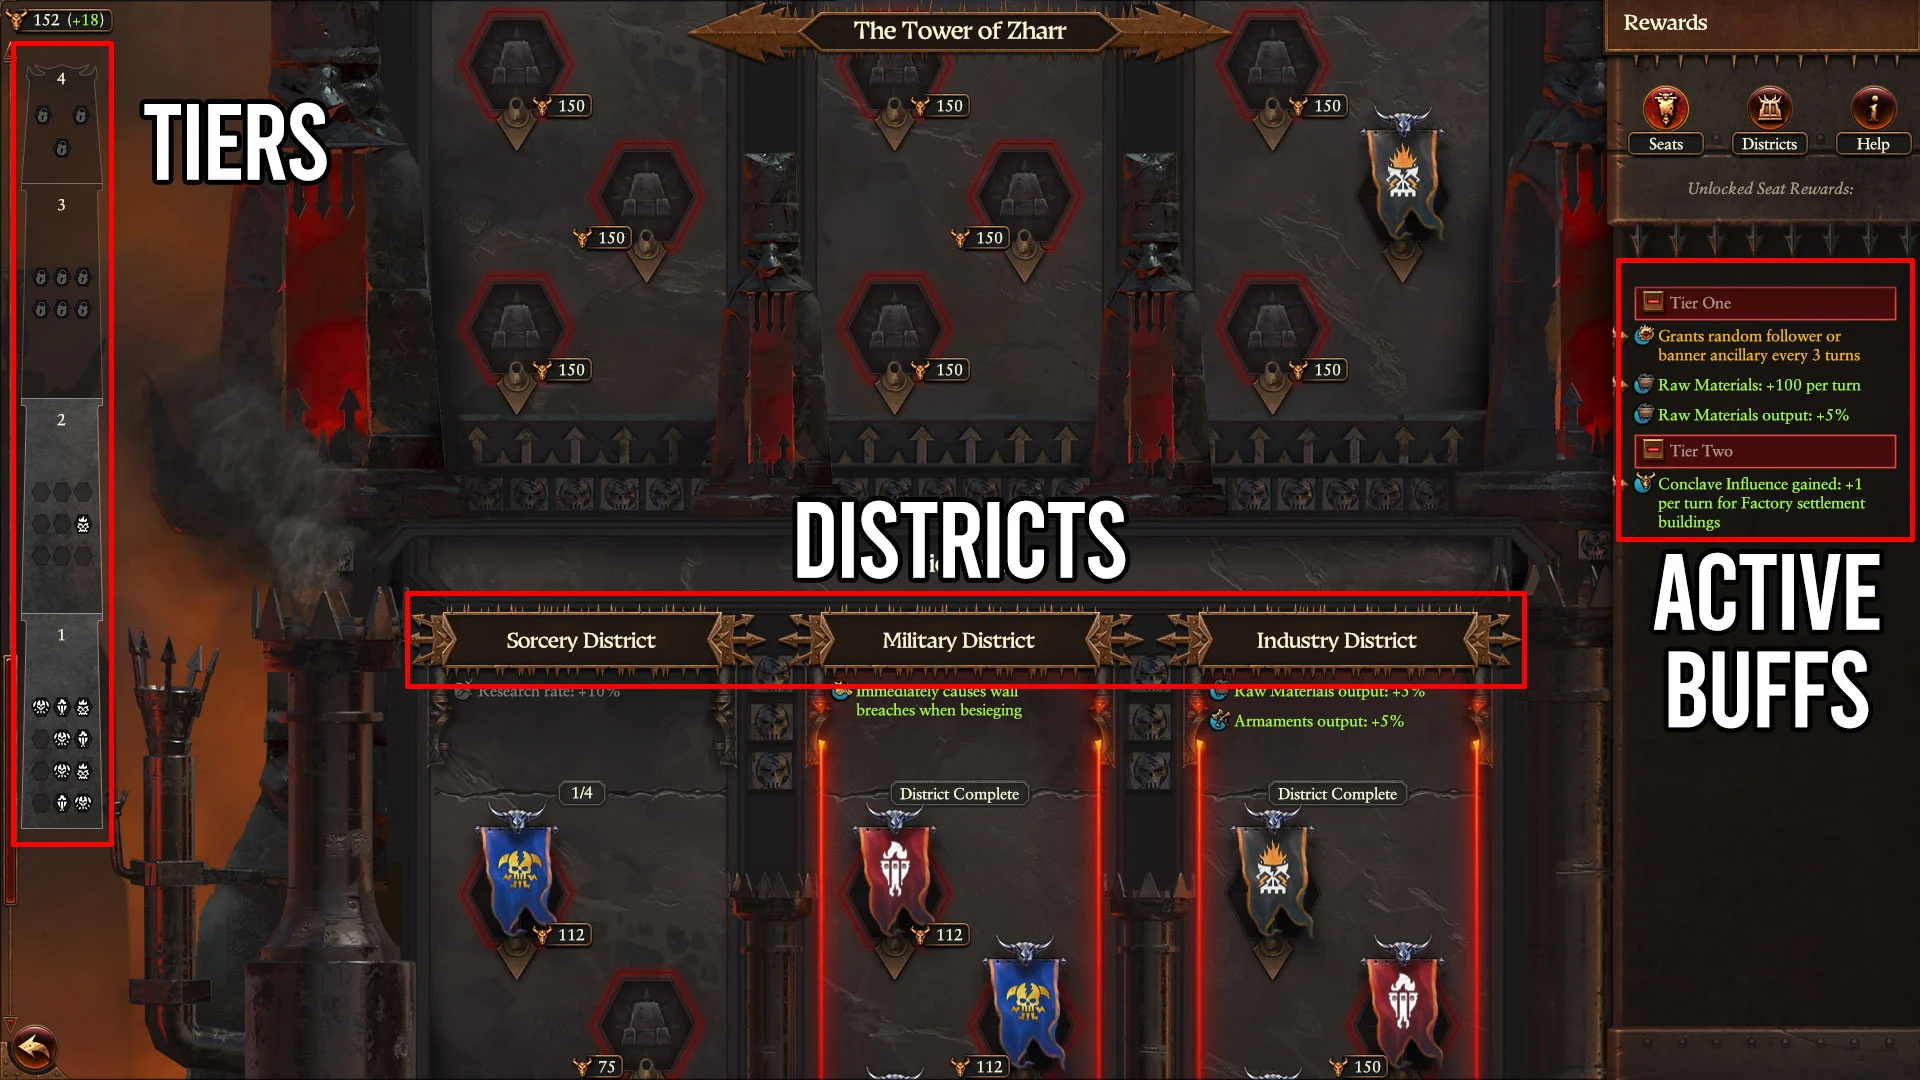
Each district provides special buffs that are attained when you fill one of the Conclave Seats. There are a total of four tiers in The Tower of Zharr, each higher tier having less seats. To unlock the next higher tier in the tower, all seats need to be filled in at least 2 districts in a previous tier before the next tier’s seats open up.
Conclave Influence and Usurping Seats
To fill a Conclave Seat, you’ll need another resource called Conclave Influence which can be acquired via expanding your territory, events & labor actions, and building Temples of Hashut. Players will also gain a certain amount of influence after each turn, and there are special passives that can also provide you with more Conclave Influence.
Seats in The Tower of Zharr are not permanent and can be Usurped after the seat has been filled for 5 turns. Usually, it will cost more Conclave Influence to Usurp a seat than it will to fill a vacant seat. Players should try to get at least one seat in each district to benefit from all the Faction-wide buffs available.
Military Convoys
Military Convoys act much like the merchant convoys of Grand Cathay and can be used to barter resources to other factions. To access Military Convoys, click the icon above the End Turn button and click Create New Convoy +.
If this is your first Convoy, select the general you want, then click Hire & Add Master button. From here, you’ll be able to set a convoy route by clicking a nearby settlement node. Closer nodes will deliver goods faster, while more far-away nodes may provide better deals. Players can have multiple convoys deployed at once.
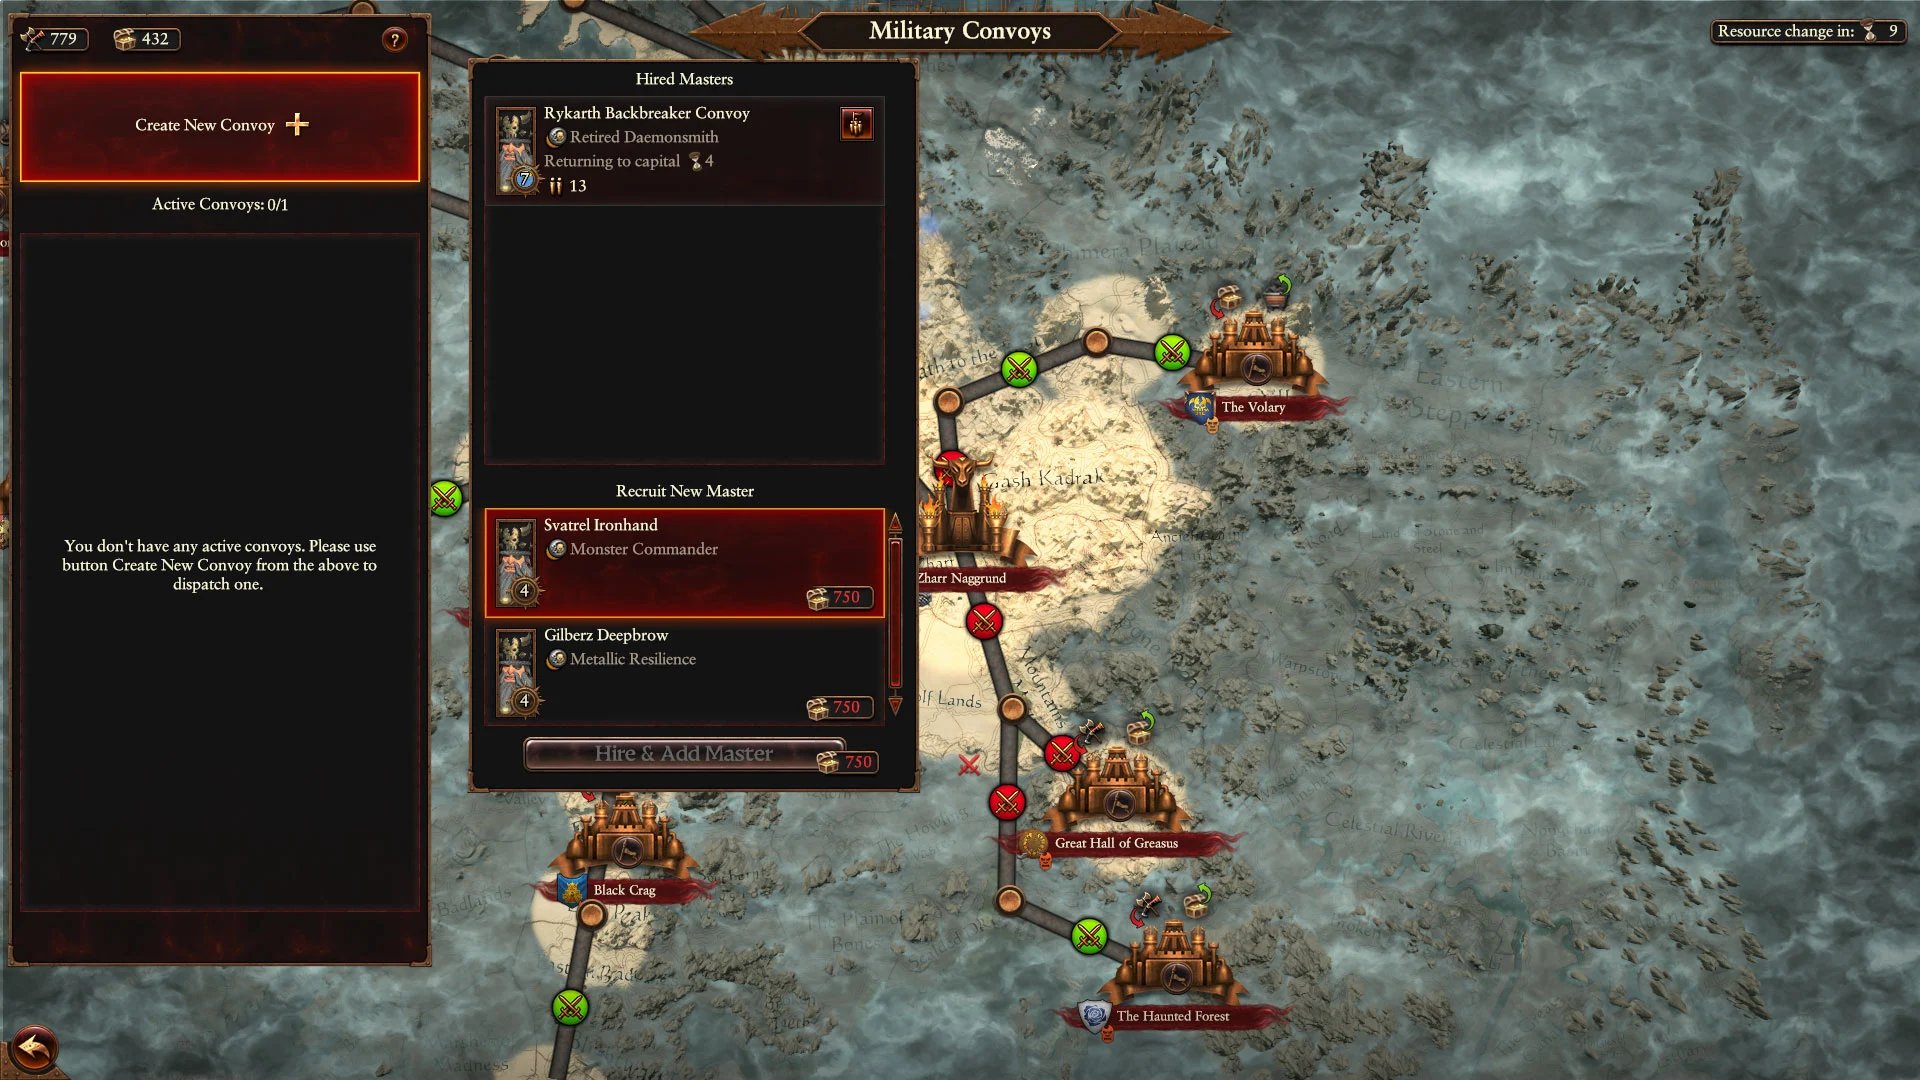
The supply on the left side above each settlement icon is what you are trading, and the supply on the right side is what you will receive in return. Military Convoys also discover new parts of the map, including new Factions depending on where you send them — so this is also another great way to explore more of your surrounding area.
Once you create a Convoy, you’ll have it permanently unless you manually disband it, or it gets destroyed in battle. Using Military Convoys is a great way to boost your economy and gain an important resource when needed. Look for the best deals, as often, there will be a few offers on the map that are just too good to pass up.
Chaos Dwarfs Technology Tree
Luckily, unlike other mechanics the Chaos Dwarfs have, their Technology Tree is fairly straightforward and broken up into 3 tabs, including:
- Military: Uses Armaments
- Sorcery: Uses Conclave Influence
- Industry: Uses Raw Materials
Military and Industry tabs are pretty self-explanatory, while the Sorcery tab focuses on the campaign map and army buffs. Each tab uses a different kind of resource in key points in the tree, so it’s again another reason to continue to maintain your supply.
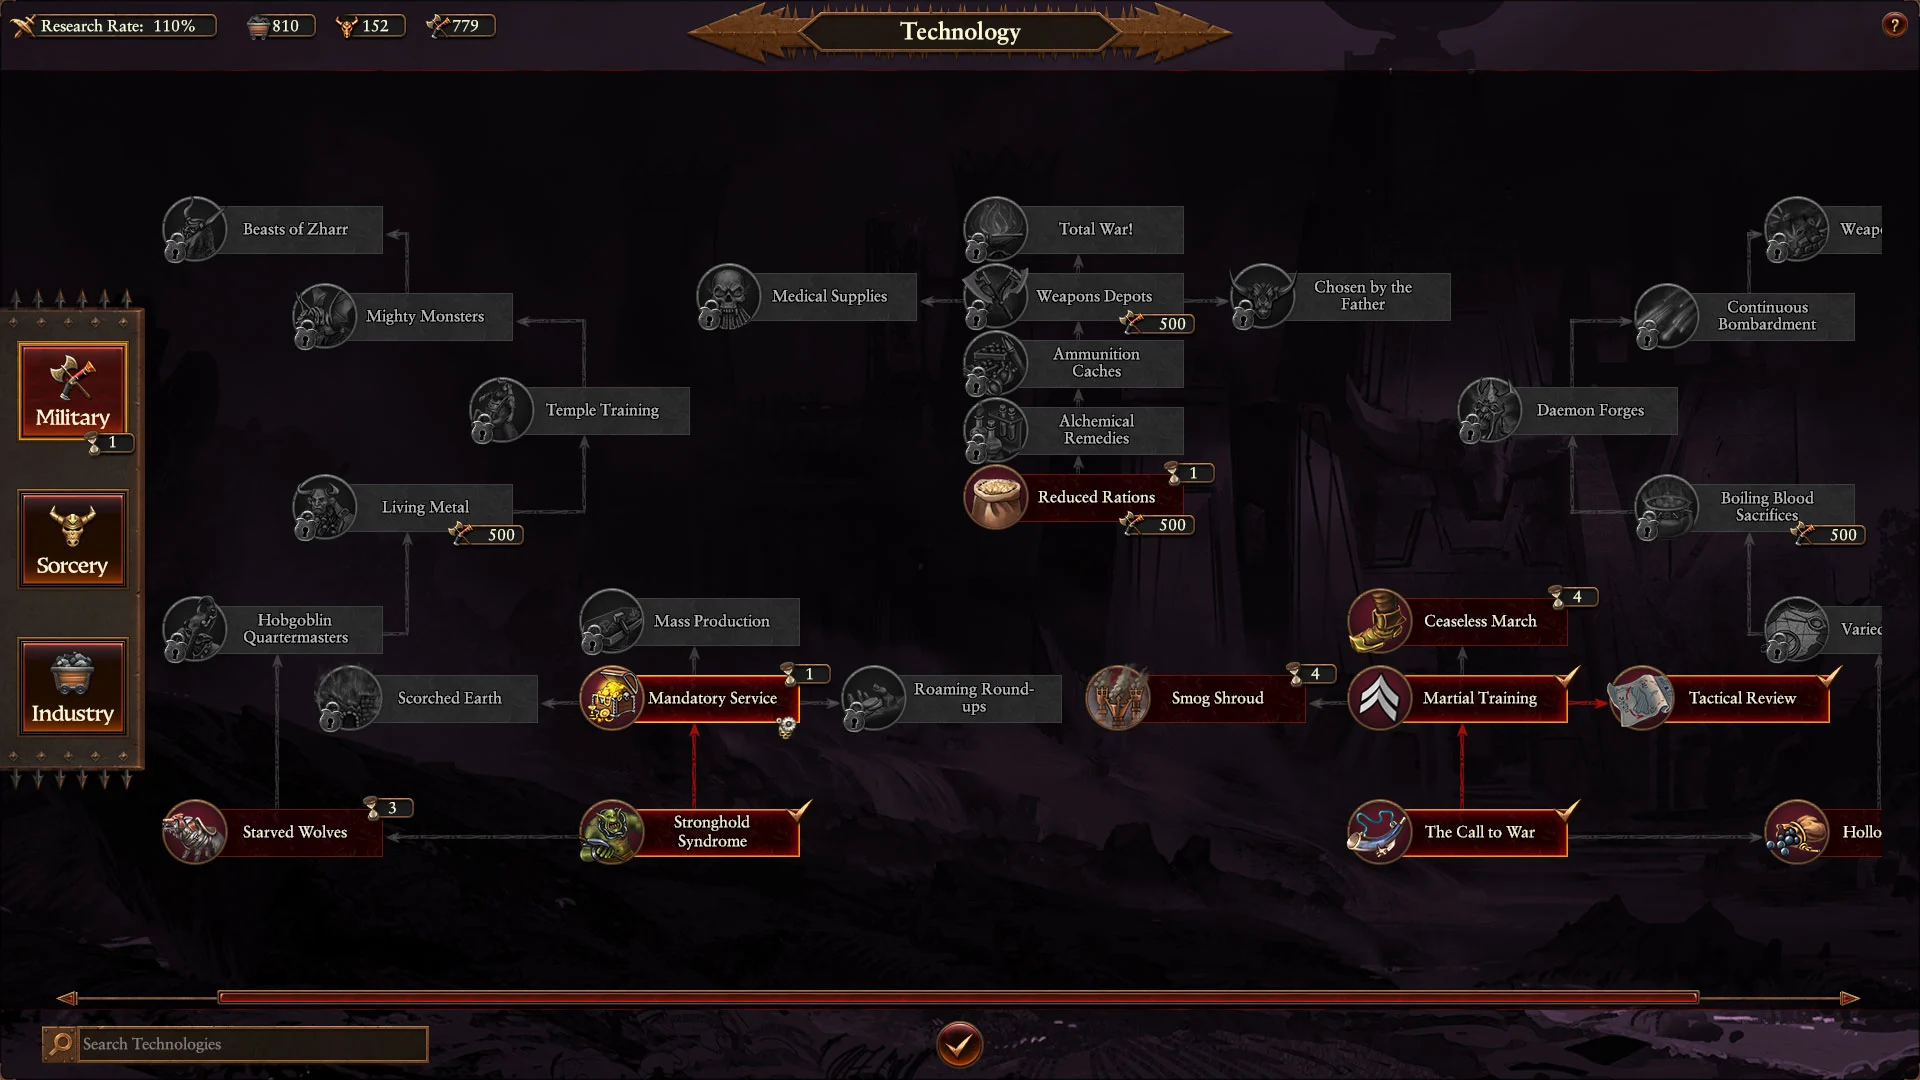
The tree you decide to invest in should depend on your playstyle. I prefer to go economy first, then branch out in my Military or Sorcery tabs, but the decision is up to you.
How Chaos Dwarfs Play
The new Warhammer 3 Chaos Dwarfs have a nicely balanced army with pretty decent melee, powerful ranged artillery, cavalry, and giant units. In totality, Chaos Dwarfs don’t truly excel in any one area when it comes to combat but are well-balanced and have a nice variety and selection of units.
In terms of settlement production and economy, while the Chaos Dwarfs economy is one of the most complex in the game to get set up, once you do, you can generate significant gold and construction supplies. If you set up your economy correctly, you can outspend most other Factions surrounding you.
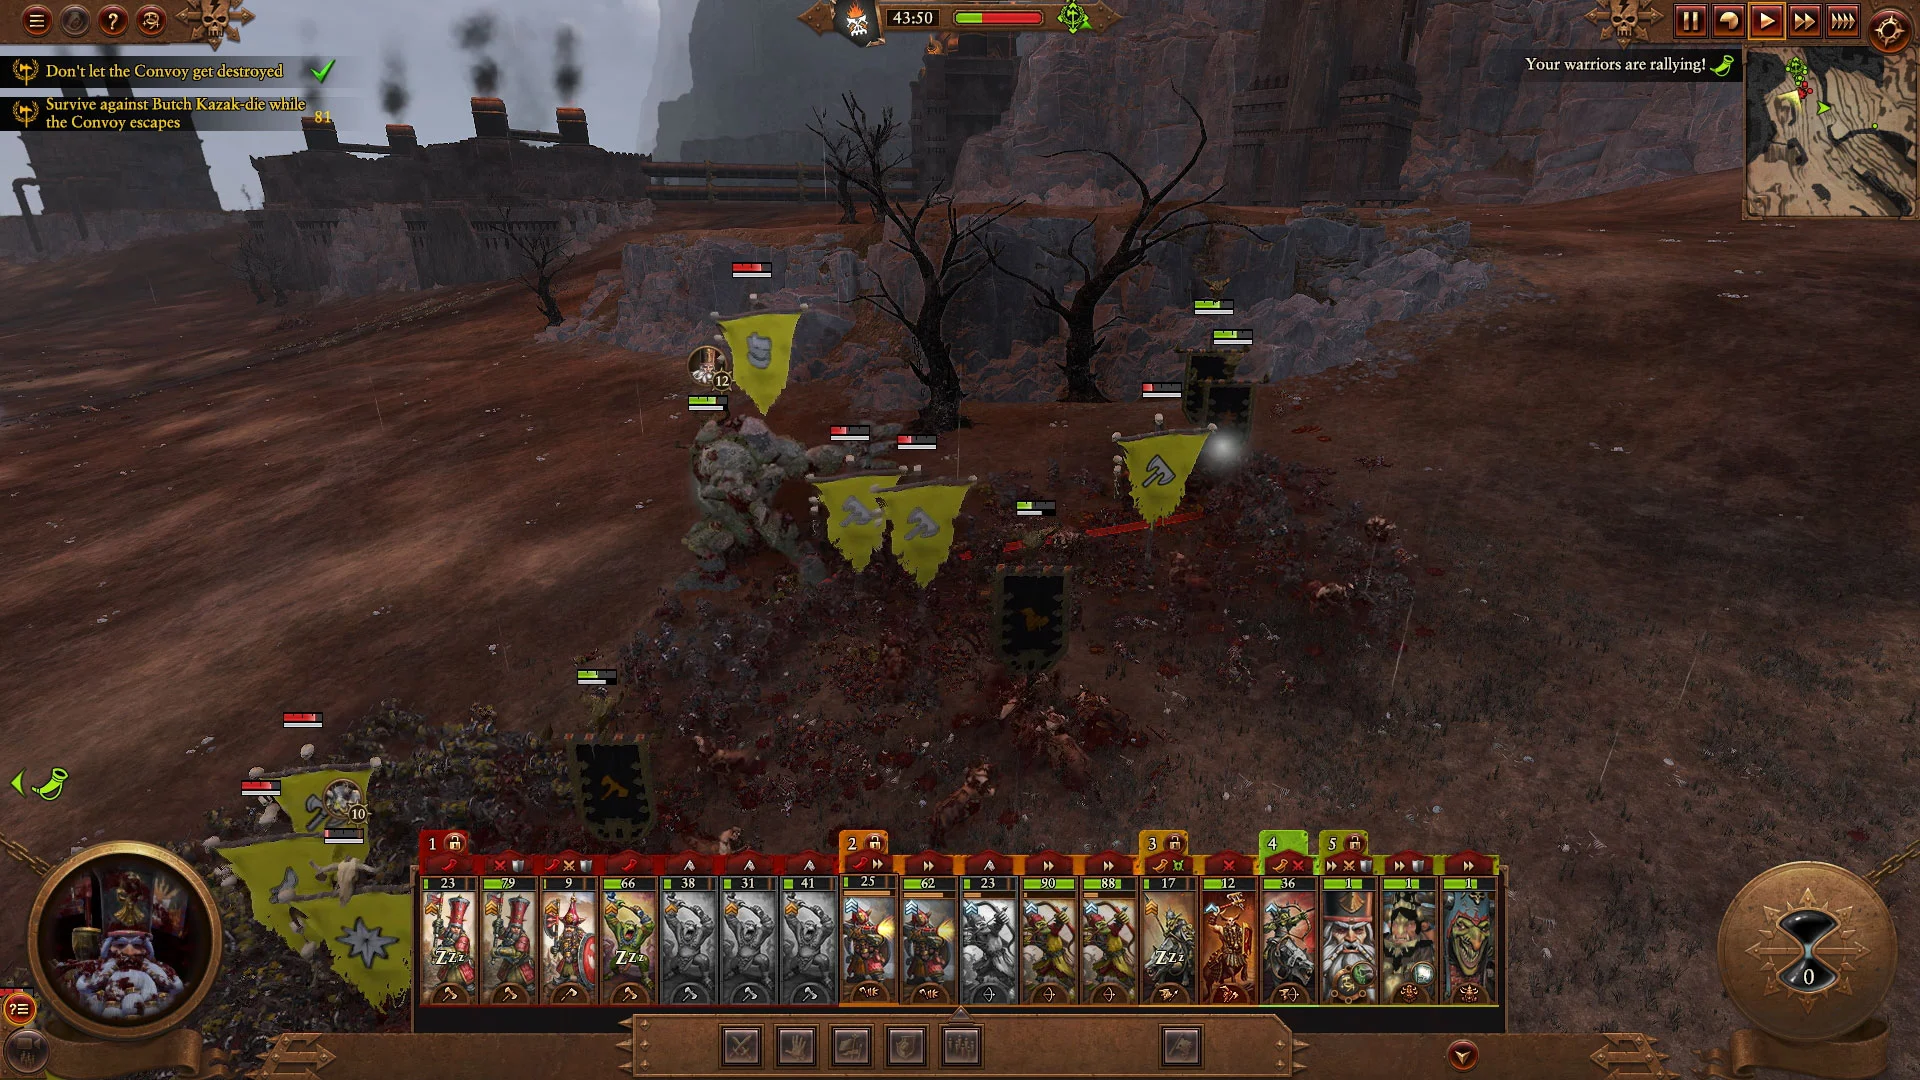
In the early game, players can use Chaos Dwarf Warriors to deal significant melee damage while using Goblin and Orc Labourers as an affordable meatshield, while Hobgoblin Archers can pepper the enemy at range.
As the game advances, Chaos Dwarfs gain access to more powerful units like Infernal Guard and Infernal Ironsword, as well as a plethora of War Machines and giant units like Destroyers and Bale Taurus.
Hero Selection
The Chaos Dwarfs have three Legendary Lords players can choose to lead their armies and include the following:
- Astragoth Ironhand (Disciples of Hashut): A powerful spellcaster and melee expert with a higher HP pool and decent armor.
- Drazhoath the Ashen (The Legion of Azgorh): A powerful spellcaster with a host of direct-damage spells and debuffs. Low HP.
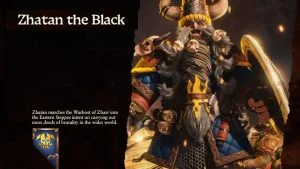
- Zhatan the Black (The Warhost of Zharr): Meele expert with strong defense, high leadership, and powerful weapon strength.
The Legendary Lord that you choose will, again, largely come down to your playstyle, and you should choose one that compliments your desired army composition. If you like to use your Lengedary Lord as a spellcaster, pick Drazhoath; if you want a hand-to-hand combat tank, choose Zhatan; and if you want a more well-rounded option, select Astragoth.
While the Warhammer 3 Chaos Dwarfs are one of the most complex factions in the game, figuring them out is well worth it as their army boasts a well-rounded nature perfect for players that want a little mix of everything. If you’re having trouble wrapping your head around all the new content, don’t worry. You’re probably not alone.
For more guides on the game, see our Total War: Warhammer 3 Section.