Mods are popular in nearly every sandbox game ever created, and WorldBox is no different. In the simulator game known as WorldBox, there are various mods available to enhance the gameplay experience. If you’re looking to try some of them out, you’ll need to know how to install them. In this guide, we’ll show you how to install mods in WorldBox using two different mod loaders.
How to Install Mods in WorldBox
To download and install mods in WorldBox, you need to get a working mod loader application. There are two working mod loader applications for Worldbox:
- NCMS
- BepInEx
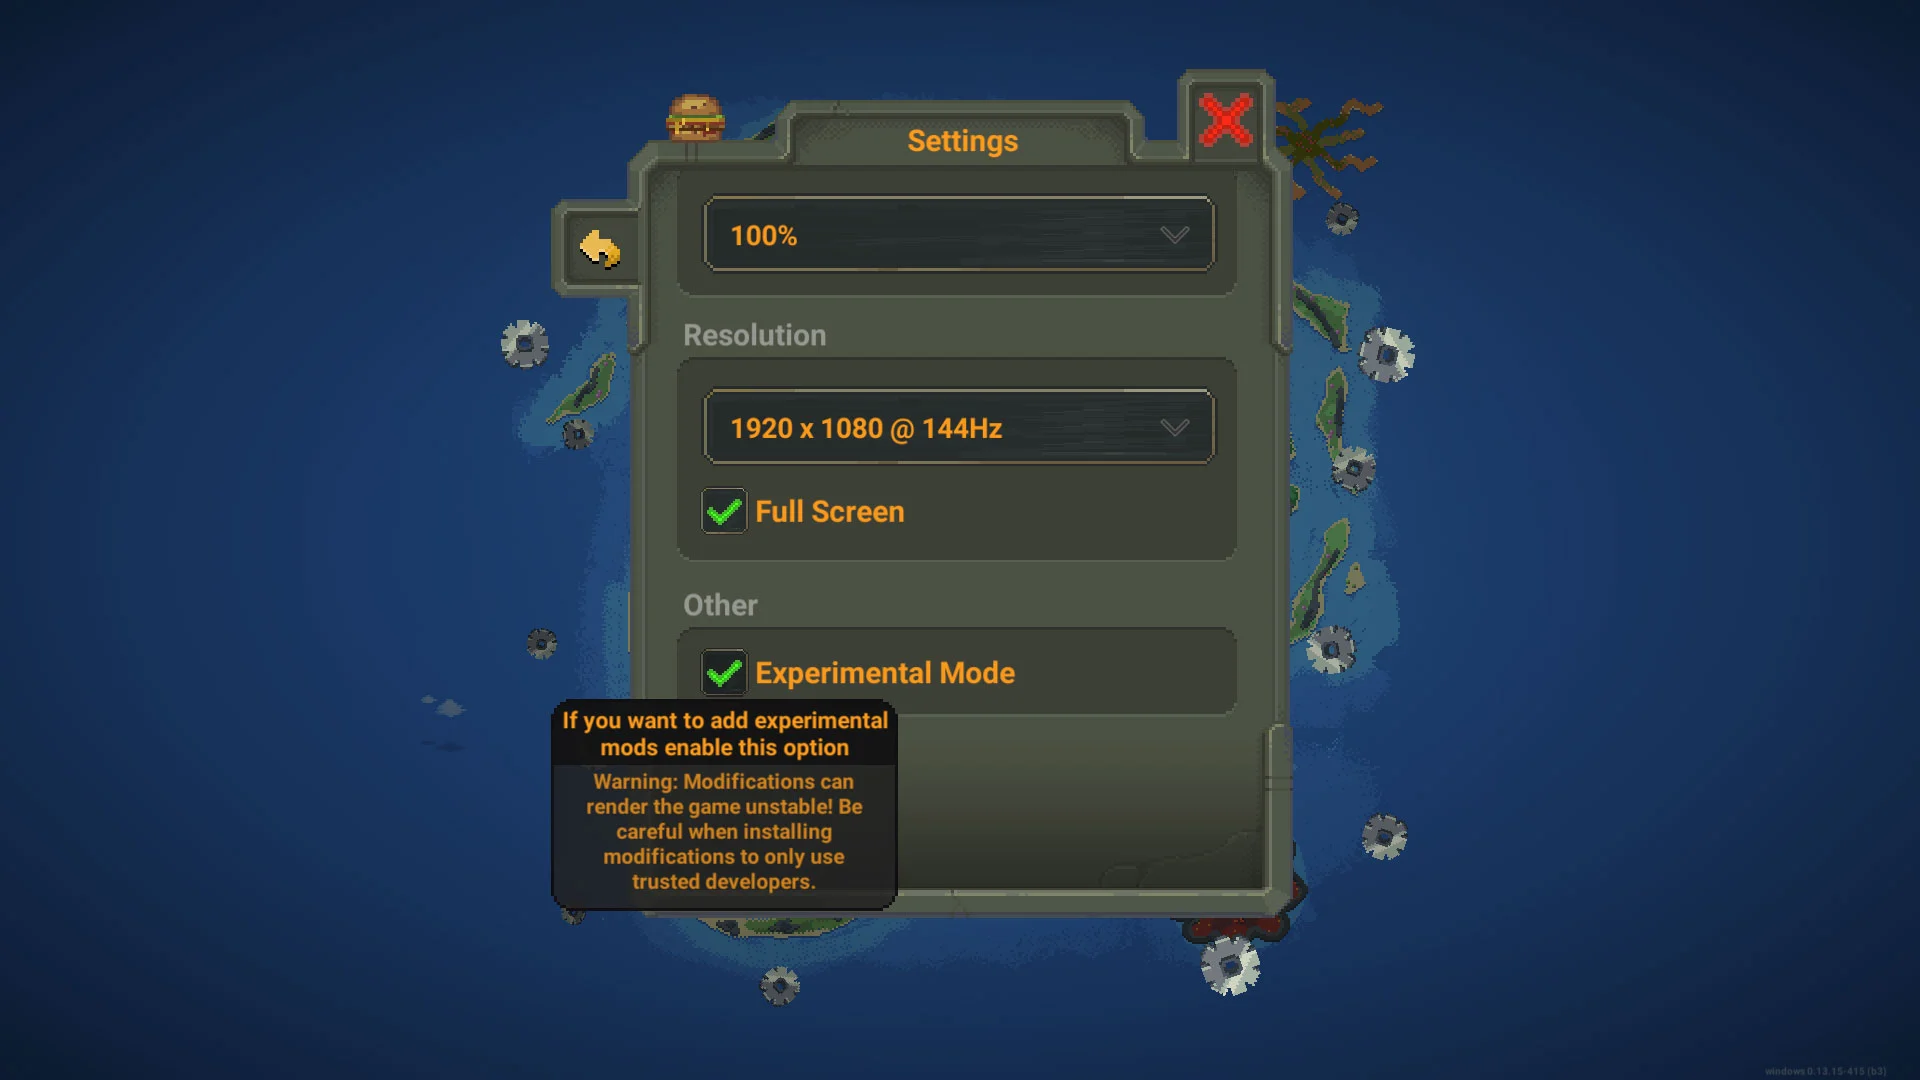
Before proceeding with these instructions, you will first need to enable Experimental Mmode. To enable experimental mode in WorldBox, launch the game and tap the game settings button. Check the box under Other that says Experimental Mode.
Installing Mods using NCMS
NCMS is the modding system for WorldBox, and it allows you to download and install mods easily. Here’s how to install NCMS:
- Run WorldBox and enable experimental mode.
- Download NCMS and unzip the NCMS.dll file to the WorldBox mods folder.
- Launch WorldBox as an administrator.
- Press M to open the Mods Window.
- Install NCMS mods into the WorldBox/Mods folder.
The first step to installing NCMS is downloading it from the GitHub repository. After downloading the .zip file, extract the contents to the WorldBox Mods folder in the following directory:
Program Files (x86)\Steam\steamapps\common\worldbox\worldbox_Data\StreamingAssets\Mods
Next, make a shortcut for WorldBox on your desktop. You can do this from your Steam Library by right-clicking the game name and clicking ‘Create Desktop Shortcut.” Right-click the shortcut and run the game as an administrator.
When WorldBox loads, press M to open the Mods Window. You should see a list of installed mods. If you do, that means NCMS is installed correctly. If you do not see the mods window, ensure the NCMS.dll file is in the Mods folder (directory listed above).
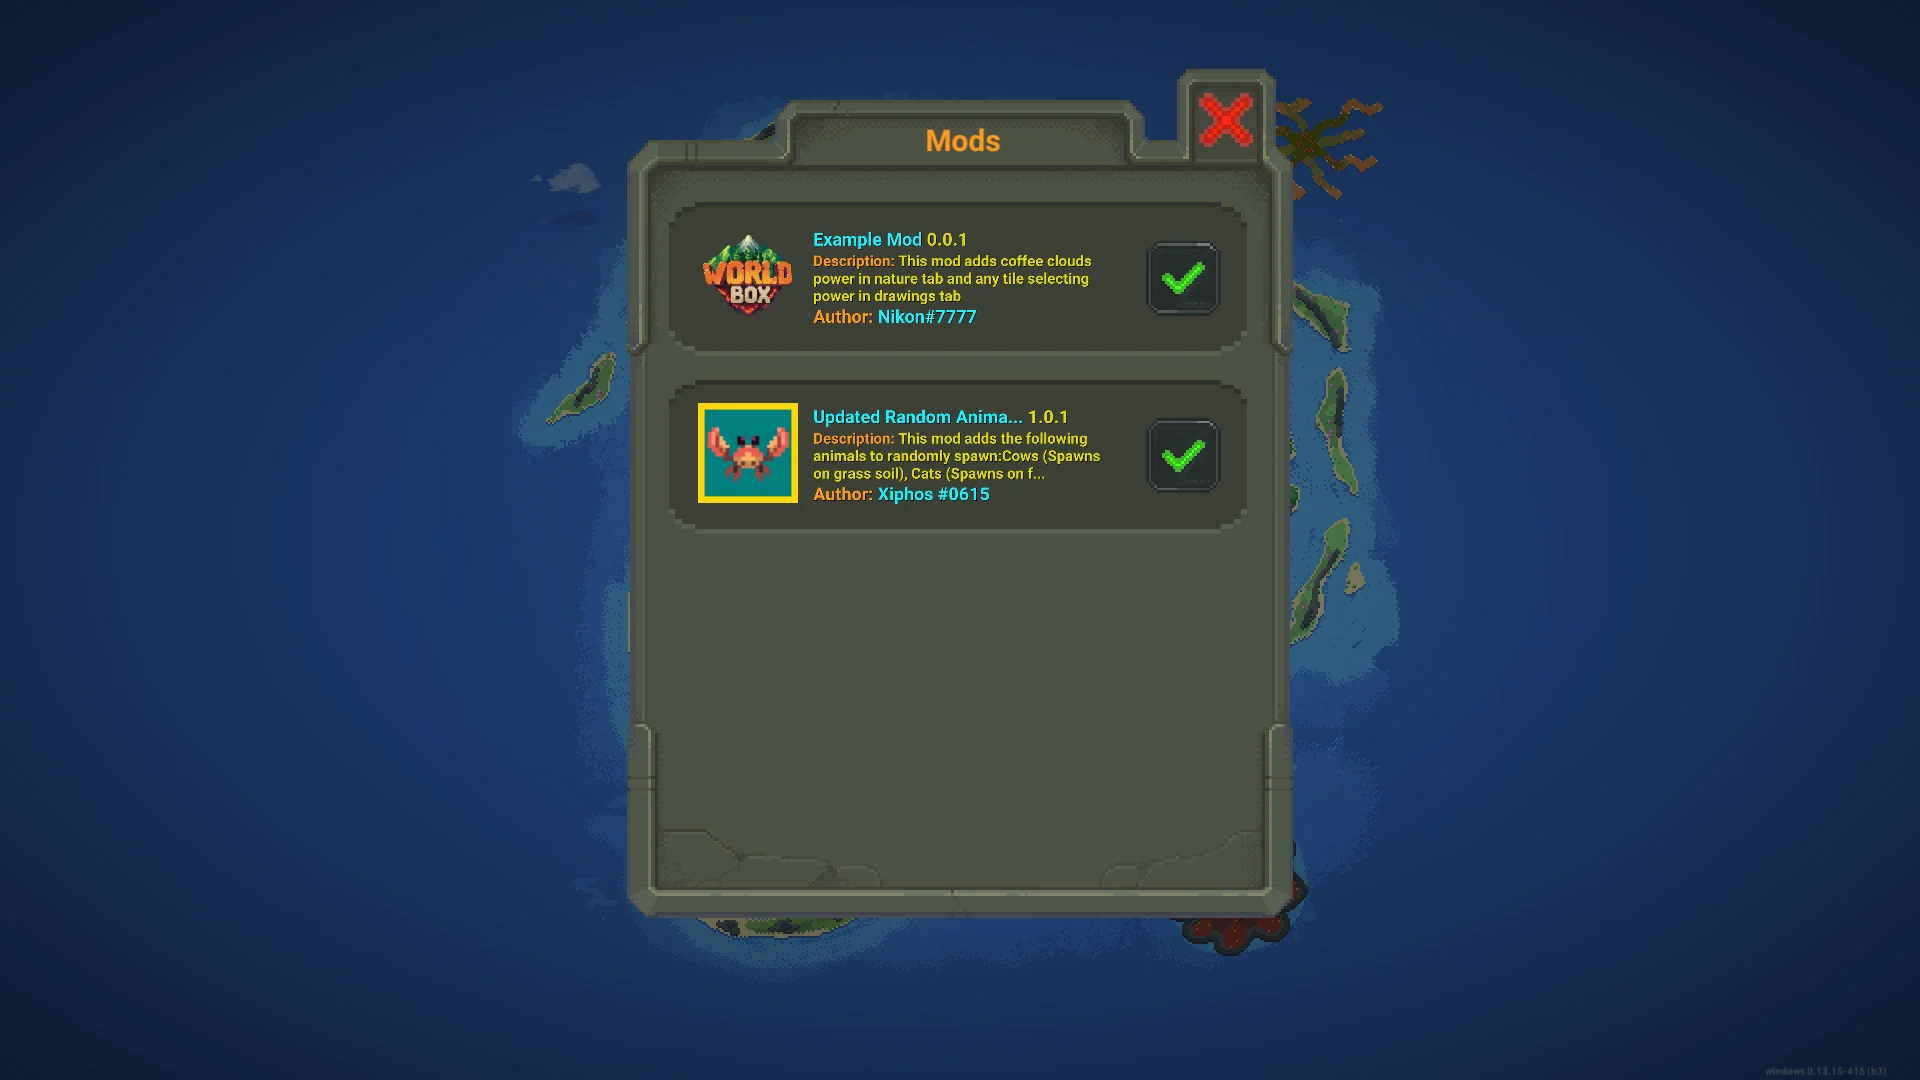
Now that NCMS is installed, a new folder has been created in the WorldBox directory. You can now install mods by moving them into the following directory:
Program Files (x86)\Steam\steamapps\common\worldbox\Mods
Check out our best WorldBox mods list post to see which ones we recommend. When you find a mod you like, download the file and move it to the Mods folder. You can then press M in-game to activate them and try them out!
Installing Mods using BepInEx
BepInEx is another mod loader that works for WorldBox. Here’s how to install BepInEx:
- Download the most recent version of BepInEx.
- Unzip the four files to the base WorldBox directory.
- Run WorldBox as an administrator.
- Check to ensure there is a plugins folder in the directory.
- Download mods and move them to the plugins folder.
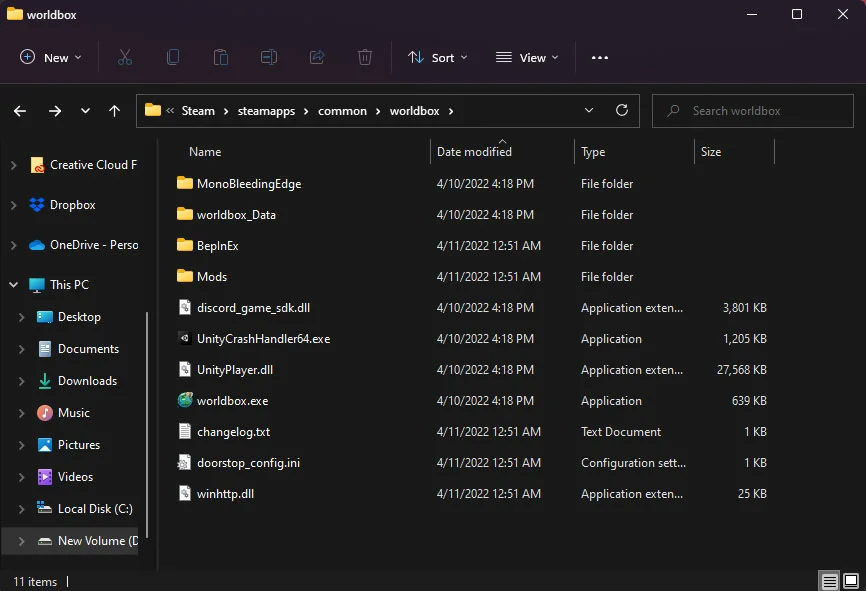
The first step to installing BepInEx is downloading it from the GitHub repository. Download the x64 version for Windows if you are on a PC. Next, unzip the four files inside the zip to the WorldBox directory located here:
Program Files (x86)\Steam\steamapps\common\worldbox
The four files in the zip should be:
- changelog.txt
- doorstop_config.ini
- winhttp.dll
- BepInEx Folder
Next, make a shortcut for WorldBox on your desktop. You can do this from your Steam Library by right-clicking the game name and clicking ‘Create Desktop Shortcut.” Right-click the shortcut and run the game as an administrator.
Launch WorldBox, and the game should create two more files, one of which is a folder called Plugins. The Plugins folder is where you will place new mods, and the mods will be in .dll format.
Program Files (x86)\Steam\steamapps\common\worldbox\BepInEx\plugins
Check out our best WorldBox mods list post to see which ones we recommend. After downloading and moving a mod to the Plugins folder, they will automatically load when you launch WorldBox. You can remove mods by removing the .dll file from the plugins folder.


