Have you just jumped into the world of The Wandering Village? One of the game’s most important aspects is ensuring that your Nomads are fed. Running out of food will ensure the demise of all your citizens, and no one wants that. Luckily, everything becomes easier once you understand how to plant crops in The Wandering Village.
Early game, you’ll encounter Berry Bushes which should satiate your colonists, but if you want to survive for the long haul, you’ll want to set up a proper farming chain to keep everyone alive and fed.
How to Plant Food in The Wandering Village – Beginners Farming Guide
To plant food in The Wandering Village, collect water from an Air Well, then build a Farm. Select the crop you’d like to grow, then plant your crops before Harvesting them. Keep reading for a step-by-step guide.
Getting Water for Farming
Before you start to plant and harvest your crops, you’ll need to gather Water for them. In The Wandering Village, plants require water to grow.
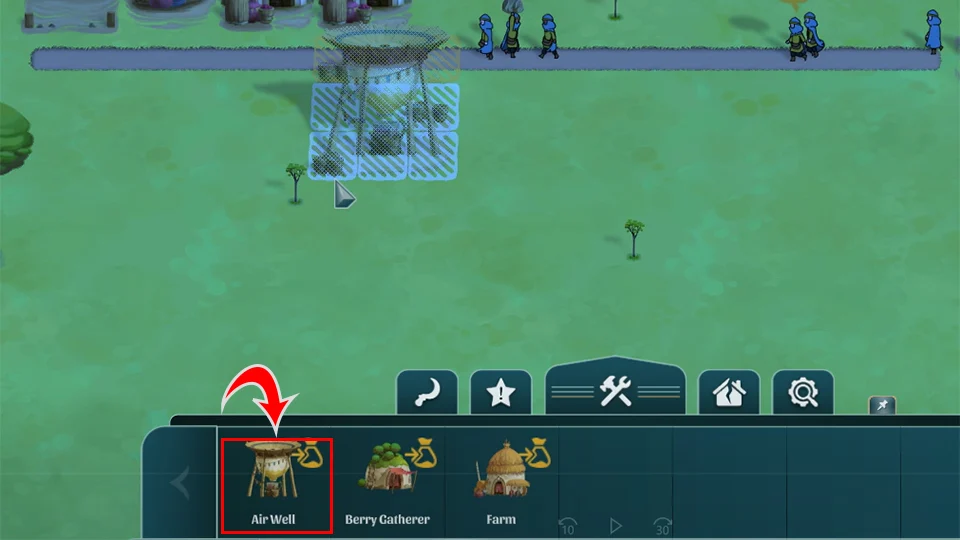
To get water in The Wandering Village, you must build an Air Well from your bottom toolbar. Then, you should build a Water Tank next to the Air Well so that your Nomads can store any excess water produced.
Planting Your Crops
Once you have a water supply, it’s time to plant your crops.
To plant crops in The Wandering Village:
- Select the Farm building in your bottom toolbar.

- Choose the type of crop.
- Hit the + Leaf icon next to Plot.
- Click and drag across the area where you want to plant your crops.
- Press the Harvesting button, so your farmers prioritize planting crops.
- Remember to build enough Pantry buildings to store your food.
Make sure you have enough villagers assigned to your Farm. When the Plant or Harvest button is not pressed, your farmers will prioritize that action.
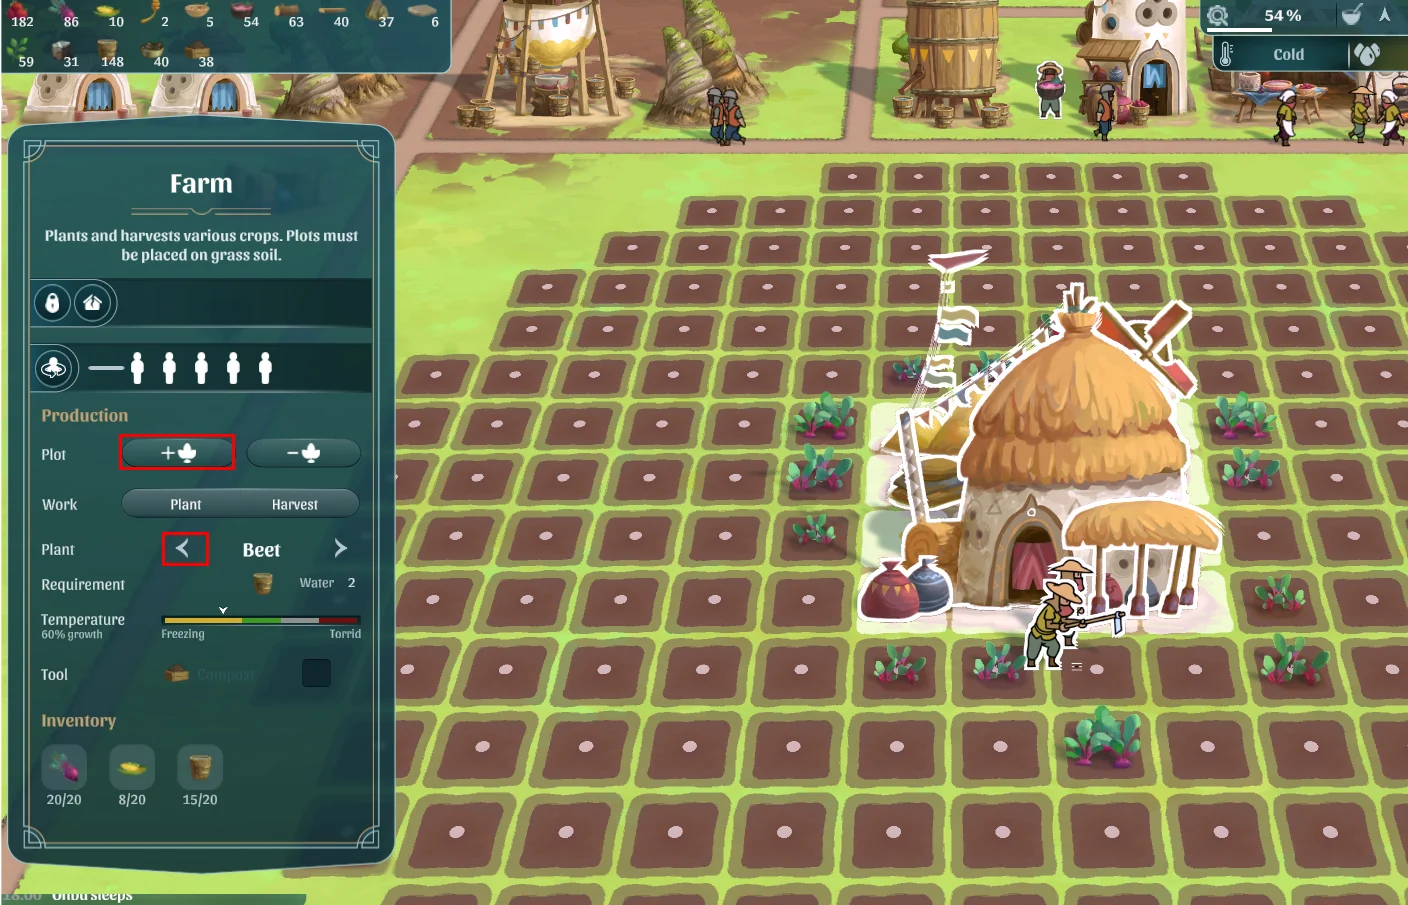
You don’t need to harvest your crops manually; your workers will do this for you as long as the harvest and plant buttons are both enabled.
The last thing to remember is to keep an eye on your food production in the top right toolbar. An up arrow indicates positive supply, and the down arrow indicates that you’re running out of food. Switch your crops to maximum growth % to maximize your food output. You can click the icon to expand the window to see more details in the Food Summary tab.
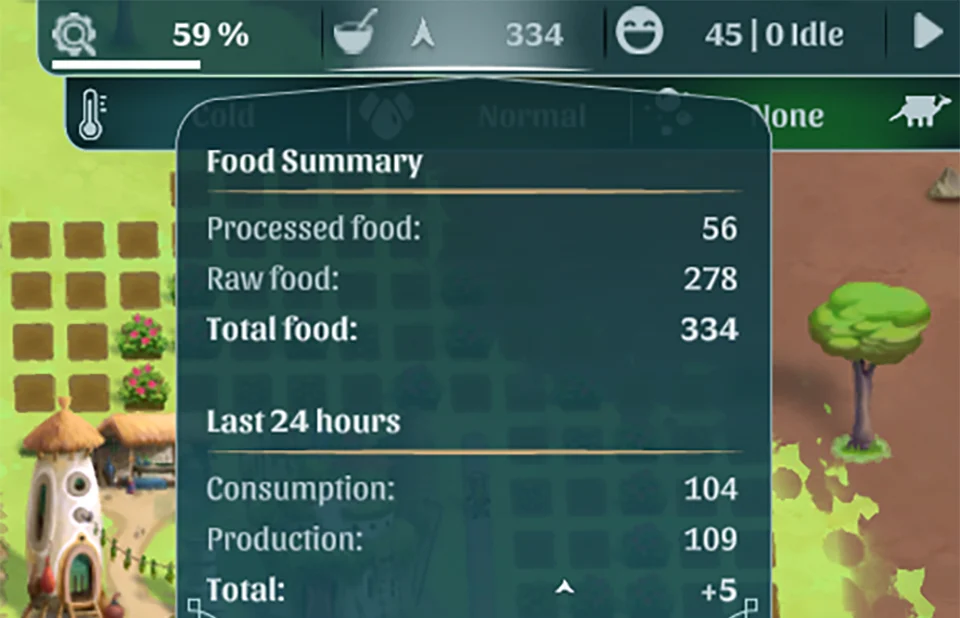
Maximizing Your Food Usage in The Wandering Village
Tracking Temperature
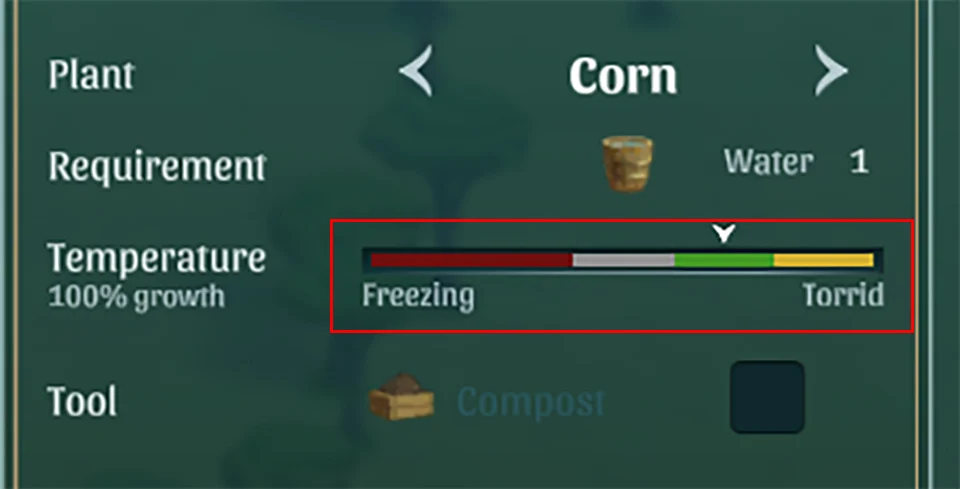
One of the most important aspects of food in The Wandering Village is Temperature. Each crop has an ideal temp, and the arrow indicates what temperature you’re currently in.
Temperature is affected by the biome your Onbu is currently in, so you’ll want to select crops that grow well in that biome.
Using the Kitchen
While your Nomads can eat raw Beets and other raw crops, food becomes much more efficient when processed into another form of food.
Build a Kitchen on the bottom toolbar, then toggle the resulting food to match with the raw material you’re growing on your Farm.
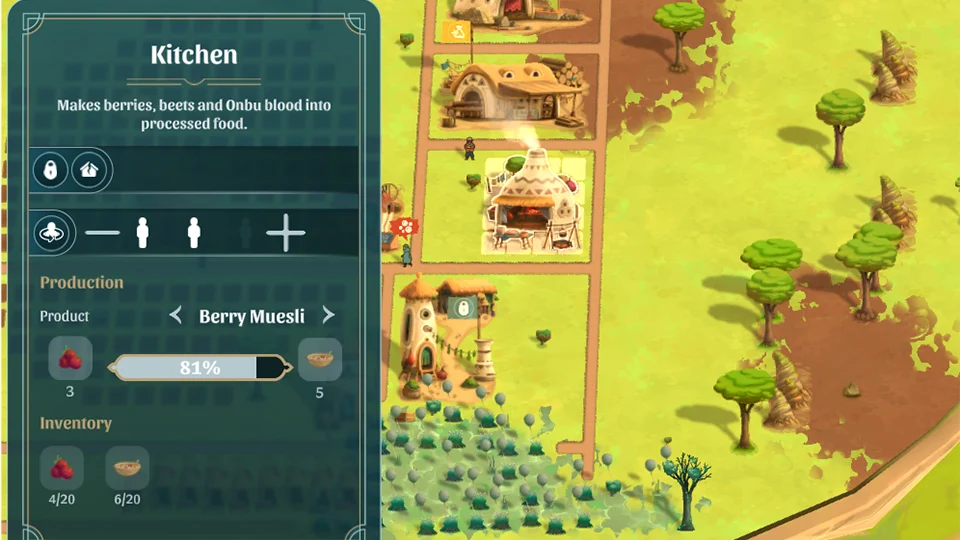
For example, we collected a lot of berries, so we toggle the product to Berry Muesli, which better feeds our Nomads.
3 Berries create 5 Berry Muesli
The Wandering Village Farming Tips
High Priority on Poisoned Crops
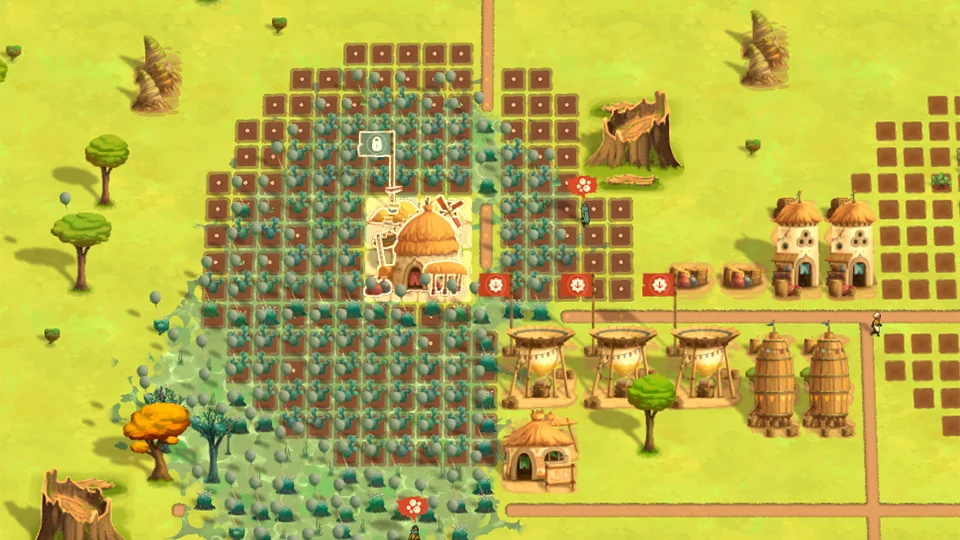
You must assign High-Priority on Nomads to destroy poisoned crops as soon as they develop. In crops, these will spread like wildfire, and your entire Farm and village will become sick.
To remove the crops, click the Sickle icon on the bottom of the screen, then click and drag over the poisoned crops.
Don’t Forget About Onbu Farming
You should also remember that you can farm and feed your Onbu. Doing so will improve the relationship between you and your Onbu so that they listen to your commands. Read our guide on Caring for Your Onbu for a more in-depth explanation.
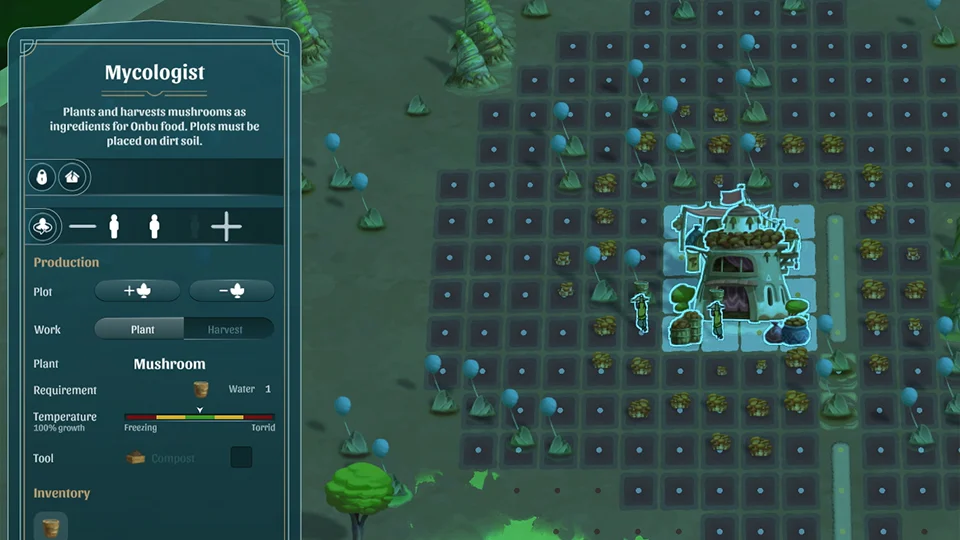
The first food you can harvest for your Onbu is mushrooms, which can be planted and harvested by a Mycologist. You’ll need to grow these crops in dirt or the dark areas on your Onbu’s back.
We hope that The Wandering Village beginners farming guide helped you plant food and keep your village strong.
Purchase The Wandering Village on Steam.
For more guides, head over to our Gaming Guides Section.

